Ready to advance your volleyball strategy beyond the basics? This guide provides a comprehensive breakdown of the powerful 6-2 formation, an offensive system designed to maximize a team’s attacking options. Moving beyond the beginner 6-6 formation, the 6-2 system allows players to specialize and ensures there are always three hitters in the front row.
This guide is perfect for intermediate players looking to understand the system used in competitive leagues.
In volleyball, teams use different formations—how players are strategically positioned on the court to maximize their effectiveness during offensive and defensive plays. In the Beginners Division and in the Recreational Division, teams play in what’s called a 6-6 formation.
The first number refers to how many players in the team attack (or hit). The second number refers to how many players in the team set. So in a 6-6 formation, all six players both hit and set.
 |
| Volleyball court divided into zones 1 through 6, showing a typical positioning for players in a 6-6 formation. 6-6 is also known as 6-0 or ‘middle set’. |
6-6 → 6 hitters, 6 setters.
In a 6-6 formation, the setter is usually a player in the front row. Most commonly, it’s either the player in the middle or the player on the right side.
6-6 allows players to learn every skill and play all positions as they rotate through the court, but it sacrifices consistency in sets and attacks because the setting and attacking quality and style changes in every rotation. Since all players are playing all positions, players also don’t get to specialize. The offence in this formation is also weaker because there are only two front-row attackers at any given time.
This type of formation is mostly seen in recreational volleyball, but as players advance to more competitive levels, teams choose different formations that allow players to specialize. These are 6-2 (6 hitters, 2 setters) and 5-1 (5 hitters, 1 setter). In a 6-2 formation, the setter is in the back-row, while the three front-row players can all attack. These are 6-2’s main advantages over 6-6: players specialize, making the team’s attacks and defences more efficient, and the extra attacker makes the offence harder to defend against.
The focus here will be on 6-2 because it is the offence system used in Intermediate 1 and 2. The idea is to explain court zones, the rotation rule, the players’ roles and the positions where they play, and finally, to show what a 6-2 formation looks like.
Many things covered here also apply to the 5-1 formation, but the idea here is not to go over 5-1 (or another less common formation called 4-2). Since we do not use a defence specialist role known as the libero in the league, it will not be covered either.
1. Court Layout and the Rule on Positioning
 |
| Volleyball court divided into zones 1 through 6. Note that the zones are numbered in order of serving: the player in zone 1 serves first; the player in zone 2 will serve second, and so on. |
To understand 6-2, the first two things you need to know are how the court is divided into zones and the rule for rotating through them.
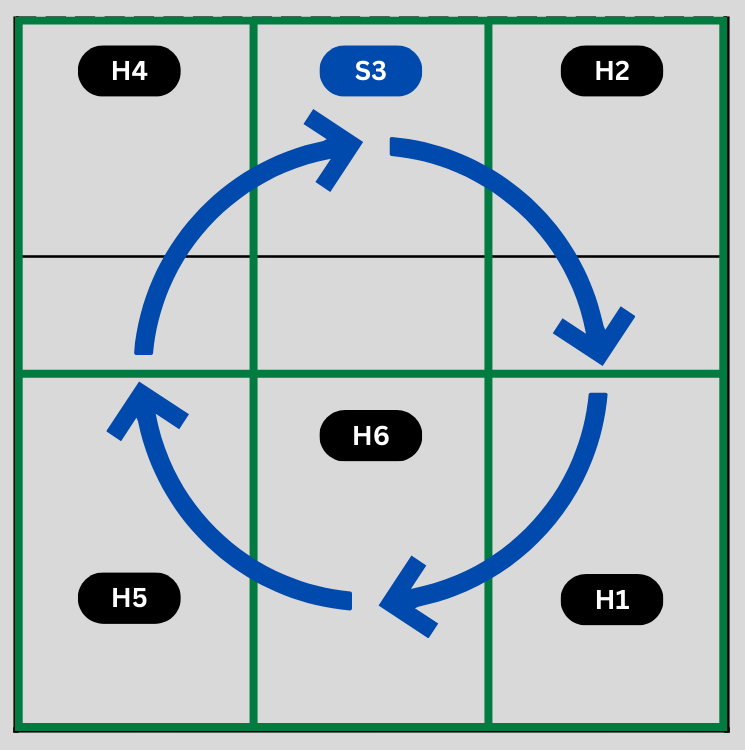
Each side of a volleyball court is divided into six zones, three in the front row and three in the back row, numbered from the back right-hand side and running counterclockwise:
- Zone 1 = back-right (when a player rotates into this zone, it’s their turn to serve)
- Zone 2 = front-right (in front of the server)
- Zone 3 = front-middle
- Zone 4 = front-left
- Zone 5 = back-left; and
- Zone 6 = back-middle (left of the server)
In volleyball, teams must follow the rule on positioning. Your team rotates clockwise after winning a rally on the opponent’s serve (also known as a “side-out”). Where you land after that rotation is your rotation position (a.k.a. your starting position). Your starting position is where you have to be when the ball is served. If you are not in that position when the ball is served, you will be ‘out of rotation’ and the opposing team will get a point.
 |  |
| Players rotate clockwise after a side-out. Here, a team in a 6-6 formation is shown. | Here, player 4 rotated into zone 3 and is now the setter. Player 2 rotated into zone 1 and now has the serve. |
Your starting position doesn’t change even if you lose a rally. It only changes when you win the serve back again after another side-out.
While it is easy to think that starting positions are tied to the zones in the court, that is not exactly true. Starting positions are not fixed points on the floor –they are positions relative to the position of the other players adjacent to them in the court.
For example, the player in zone 1 must be farther away from the net than the player in zone 2, and to the right of the player in zone 6, when the ball is served. As long as those two conditions are met, the position of the player in zone 1 is legal.
Likewise, the player in zone 6 must be farther away from the net than the player in zone 3, to the right of the player in zone 5, and to the left of the player in zone 1, when the ball is served. As long as those conditions are met, the position of the player in zone 6 is legal.
 |  |
| This graphic shows the players adjacent to player 1. Since player 1 is farther away from the net than player 2, and farther to the right than 6, player 1 is in the correct rotation. | This graphic shows the players adjacent to player 6. Since player 6 is farther away from the net than player 3, farther to the right than 5, and farther to the left than player 1, player 6 is also the correct rotation. |
So at the risk of sounding technical, the rule on positioning is as follows:
- In each vertical column (zones 4-5, zones 3-6, and zones 2-1) the front-row player must be closer to the net than the back-row player;
- In each horizontal row (zones 4-3-2, and zones 5-6-1) the player in the leftmost zone must be closest to the left side of the court; and
- In each horizontal row (zones 4-3-2, and zones 5-6-1) the player in the rightmost zone must be closest to the right side of the court.
This rule applies to every player, but gives players the flexibility to position themselves in strategic ways when a rally starts. For instance, on serve-receive, if the setter is in the back row (like in a 6-2 formation –more on this later), the setter can be moved closer to the net so they don’t take the first contact and they remain available to take the second contact and set the ball. This is not mandatory—it is a strategic choice, and hiding the setter from a serve is valid as long as the players are not out of rotation (this will be useful to understanding 6-2).
 |  |
| This graphic shows the setter in zone 1 moving closer to the net to avoid being the first contact in serve-receive. Other players can also move to a better position to receive the serve, as long as they are not out of rotation. | All players shifted to receive the serve. Note that they are all still in the correct position. For example, player 6 is still farther away from the net than player 3, farther to the right than player 5, and farther to the left than player 1. Likewise, player 4 is still closer to the net than player 5 and farther to the left than player 3. |
Something to keep in mind: when a player is serving, they are outside of the court, so they don’t affect the positioning of their teammates inside the court.
2. Player Roles
 |
| Powers (OH1 and OH2) play from the left side; middles (MB1 and MB2) play from the middle; and setters (S and SO) play from zone 1 when setting, and from zone 2 when playing as setter-opposites. |
A team in a 6-2 formation will have six players divided into three specialist pairs:
Outside Hitters (a.k.a. “Powers”)
They are the primary attackers (but also defend). In the front row, they hit from the left side of the court. In the back row they play defence, receive serves, and pass the ball to the setter to coordinate an attack. In the next few graphics, we will refer to these players as OH1 and OH2.
 |
| In their starting position, each pair of specialists are opposite each other. In the rotation shown here, the setter is in zone 1, and the setter-opposite in zone 4. |
Middle Blockers (a.k.a “Middles”)
They are the primary defenders (but also attack). In the front row, they focus on blocking the opponent team’s hits all across the net, and they also execute quick attacks from the middle of the court. In the back row, they play defence. In the graphics, we will refer to these players as MB1 and MB2.
Setters
They are the organizers of the offence and have a dual role. In the back row they are the team’s setter and they coordinate attacks by setting the ball to the players in the front row. They also help in defence. In the front row they don’t set anymore — they become right-side hitters (a.k.a. “opposite hitters” as in “opposite to the setter”). This switching of roles is why 6-2 has that name: every player attacks when playing in the front row, and two players act as setters (when they are in the back row). In the graphics, we will refer to the setter as S and the opposite as SO.
Each pair of “specialists” (two powers, two middles, two setters) start opposite to each other in every rotation.
3. From Starting Position to Playing Position
As we explained above, after winning a rally on a serve-receive, the team must rotate clockwise. But volleyball strategy relies on specialization, and if the players are rotating through each zone in the court there will be times when players will have to start in a zone that isn’t their strongest playing position. The solution is to move the players from their starting positions to the position they play best. Let’s call those their playing positions.
Remember: starting positions are where players have to be when the ball is served, but once it is served, the players are free to move around the court and ‘switch’ into their playing positions.
This “switching” allows each player to respect the rotation rule at the start of a rally while still putting themselves into the position where they can do their job best once the rally has started: powers will ‘switch’ to the left-side zones of the court; middle-blockers will ‘switch’ to the middle zones; and setters will ‘switch’ to the right-side zones.
If a player’s starting position was in the back row, the switch is to their playing position in the back row. It’s the same with the players in the front row. Players never switch from the front row to the back row or vice versa.
 |  |
| Your team serves. S is in zone 1. The arrows show where each player will go after the serve. Since S is not inside the court, they do not affect rotations. | Players after the switch, in their playing position and ready to defend. |
When does the ‘switch’ happen? As soon as the ball is headed to the other side of the court:
- If your team is serving, the switch happens immediately after the ball is struck. This is because your team is not under immediate attack and should prepare to defend.
- If your team is in serve-receive, the switch happens after the ball is sent back to the opposing team. Players receive the ball in their starting positions, coordinate and execute an attack from their starting positions, and then they switch to their playing positions. Why? You don’t want players running to their playing position and at the same time trying to receive a serve! The only exception to this movement is that of the setter (more on this later).
4. Getting There Faster
Remember how players have the flexibility to position themselves in strategic ways when the rally starts, as long as they are not out of rotation? That’s useful here.
If your team is serving, you can position yourself as close to your playing position as you can inside the court to make your ‘switch’ faster. If players move closer to where they want to go there will be less ground to cover once the ball is served. That means your team will be ready to run a defence faster. If you ever see players in volleyball stacking somewhere in the court when their team is serving, what they’re doing is getting as close as they can to their playing position without breaking the rotation rule.
 |
| Your team serves. S is in zone 1. Players are stacking closer to their playing positions but still in the correct rotation. Again, the setter is currently outside of the court and therefore they do not affect rotations. After the serve, all players will switch to their playing positions. |
If your team is in serve-receive, you can hide your setter from the serve and pull a player back to help receive the serve. This is done to ensure that your specialist at coordinating attacks is free to make the second touch. Teams commonly do this by either pulling the player in zone 2 away from the net and putting them right in front of the setter in the back so as to ‘shield’ them from the serve, or by moving the setter towards the net and pulling a player from the front row to the back to help receive. The latter option is the most commonly used in Intermediate 1 and Intermediate 2 and it’s shown here:
 |  |
| Your team is receiving. The setter is in zone 1. The setter is moved towards the net and the right-side hitter is pulled back to help in the serve-receive, pushing the back row players rightwards. | |
All these graphics might give the impression that the players are static in the court both before and after the ‘switch’, but you probably know by now that volleyball is a game of constant motion and players are never really standing still. During play, defenders in the back row react to the swings of the opposing attackers, track their own teammates’ movements, and chase down balls that come their way. In the front row, players go from blocking at the net or covering sharp angles to stepping away from the net to prepare and launch an attacking approach. Every rally is a flow of adjustments and reactions, and while the ball is in play, players are always moving from a defensive position to an attack, and then back again to a defensive position, and then back again to an attack, and so on.
Think of 6-2 as a formation that gives your team a much stronger attack and defence by simply adding one more movement at the start of every rally: from where you must start, to where you want to play.
5. The Setter is Always on the Run: Moving Between Defence and Setting
That said, the setter is the one doing the most moving. Unlike other players, the setter has two “workstations.” On defence, the setter’s position is in the back row, in zone 1. That’s where they cover when the opponent is attacking (except on serve receive, when they are being hidden). But once their team gains control of the ball, the setter’s setting job begins: they sprint up to their second workstation—near the net between zones 2 and 3—from where they deliver the set.
The rhythm goes like this: the setter is in zone 1, defending. If the setter is not the one who made the first touch, they immediately move to set in between zones 2 and 3. From there, they can set the ball to any of the three attackers: the power in 4, the middle in 3, or the right-side hitter in 2. After setting, the setter retreats back to zone 1 to defend. This pattern repeats every time the ball crosses to their side. On serve receive, the setter is hiding from the first contact. When the ball is struck, the setter sprints to their second workstation, sets, and then makes the ‘switch’ with the rest of the players. So if you’re the setter, be prepared. You will be moving a lot!
 |  |
| Your team is serving. S is in zone 1. The focus here is on S. After the serve, switch! S moves to their playing position. Once the ball comes back, S moves to their setting spot, sets, and then moves back to defend. | Now, your team is receiving. S is in zone 1, but hidden from the serve. After the serve, S moves to their setting spot, sets, and the team attacks. Now, switch! S moves to their playing position. |
6. Putting It All Together: What Each Rotation Looks Like
So, a quick recap, in 10 points:
- Each side of a volleyball court has six zones. After a side-out, your team must rotate one zone, clockwise. Where you land after that rotation is your starting position.
- Your starting position is where you have to be when the ball is served. Once the ball is served, you are no longer bound to your starting position.
- Your starting position is relative to the players adjacent to you. It’s not a fixed spot in the court.
- Your team can position players anywhere in the court for strategic reasons, as long as they are not out of rotation by breaking the rule on positioning.
- Players specialize into powers, middles, and setters. Each pair of specialists start opposite to each other in every rally. 6-2 puts the setter in the back row, adding one more attacker to the front row (the other setter becomes the setter-opposite (a.k.a the right-side hitter) while in the front row.
- Players ‘switch’ from their starting positions to their playing positions when the ball is sent over to the opposing team’s side:
- if your team is serving, the switch happens immediately after the serve; and
- on serve-receive, the switch happens after your team sends the ball across the net.
- The switch is back-to-back and front-to-front. Players never switch front row to back row or vice versa.
- When your team is serving, the goal is to switch players into their playing positions fast: stack them as close to their playing positions as possible without breaking the rotation rule.
- When your team is receiving, the goal is to hide the setter from the serve without sacrificing defence. One way is to push the setter close to the net and pull a player back to receive.
- The setter has two ‘workstations’: they defend from zone 1 but they move to a spot in between zones 2 and 3 to set, and then move back again to zone 1 to defend. This movement happens after every attack from the opposing team until the rally ends.
Below, we’ll show the rotations, both on serve and on serve-receive. The order the players have for the rotation (who is following who in the rotation) follows the most typical order you will see in I1 and I2: the power follows the middle and the middle follows the setter, or P-M-S). In other divisions or leagues you may see an M-P-S order. While there may be some tactical differences, don’t worry about that for now. Just know that the typical order you will see here will be P-M-S.
To keep things as simple as possible, for the remaining graphics the players are renamed P (powers), M (middles), S (setter), and SO (setter-opposite). I recommend that you focus on the movements of one player on the court rather than all of them at once. Start with the position you will be playing and follow that position through the rotations.
Rotations 1 and 4: A Power in Zone 1
| Serve | ||
| Rotation line-up | Starting position | Playing positon |
 |  |  |
| Your team has the serve. In this rotation, all front-row players and M in the back row are already in their playing positions. Only P in the back row and S will have to switch after the serve. | The setter moves closer to M to make the switch faster. P, serving, moves to serve. | After the serve, all players assume their playing positions. |
| Serve-Receive | ||
| Rotation line-up | Starting position | Playing positon |
|  |  |
| Now, your team is receiving the serve. It’s best if S doesn’t receive the serve, so your team will adjust to hide the setter: S will move closer to the net towards P in the front row. SO pulls back to help in serve-receive, pushing the back row leftwards. M in the front row adjusts to cover any serves coming close to the net. | Players are in position to receive. Immediately after the ball is struck, S moves to their setting position to set the ball. All front-row players (including SO) prepare to attack. Once the ball is set and the attack happens, players switch to their playing positions. | After your team attacks, all players assume their playing positions and prepare to defend. |
Rotations 2 and 5: The Setter in Zone 1
| Serve | ||
| Rotation line-up | Starting position | Playing positon |
 |  |  |
| Your team wins a rally and players rotate one zone clockwise. SO moves to the back row and becomes S. (S moves to the front row and becomes SO). | Players stack in the middle front and middle back of the court. S moves to serve. Note that all players remain in their starting position, just stacked together. | After the serve, all players switch to their playing positions. |
| Serve Receive | ||
| Rotation line-up | Starting position | Playing positon |
|  |  |
| Now, your team is receiving the serve. It’s best if S doesn’t receive the serve, so your team will adjust to hide the setter: S will move closer to the net towards M in the front row. SO pulls back to help in serve-receive, pushing the back row rightwards. P in the front row adjusts to cover any serves coming close to the net. | Immediately after the ball is struck, S moves to their setting position to set the ball. All front-row players (including SO) prepare to attack. Once the ball is set and the attack happens, players switch to their playing positions (note that this starting position is a mirror image of the previous rotation’s starting position). | After your team attacks, all players switch to their playing positions. |
Rotations 3 and 6: A Middle in Zone 1
| Serve | ||
| Rotation line-up | Starting position | Playing positon |
 |  | |
| Your team wins a rally and players rotate one zone clockwise. The M that was in the front row moves to the back row, and vice versa. M in the back row moves to serve. | Players in the front row stack in the middle. P in the back row is already in their playing position. Since M moved out of the court to serve, M no longer affects S’s positioning, so S can immediately go to their playing position. | After the serve, all players assume their playing position. |
| Serve Receive | ||
| Rotation line-up | Starting position | Playing positon |
|  |  |
| Now, your team is receiving the serve. Your team will adjust to hide the setter: S will move closer to the net towards SO in the front row. M pulls back to help in serve-receive, pushing P in the back row rightwards. | Immediately after the ball is struck, S moves to their setting position to set the ball. All front-row players (including M on the left) prepare to attack. After the attack, players switch to their serving positions. | After the serve, all players assume their playing position. After you win a rally, rotate one zone clockwise. Then repeat the same pattern for Rotations 4, 5, and 6 (which are the same as Rotations 1, 2, and 3. |